By creating Messaging Groups users will be able to communicate duty changes between other members of the group.
Navigation
Set up a Messaging Group
When a Supervisor makes changes to duties on the Editable Daily Posting sheet on GRS Web, it is useful to communicate these changes to all staff that they affect at the same time, rather than person by person which would be time consuming. Each Message Group created will be attached to one or more Roles in System Security and when duty changes are made by the Supervisor every person who has that role assigned will receive a message (through the message centre) detailing the changes. A two way communication link opens once any such messages have been created.
1. Click on the Tools option on the main menu and then select Messaging Groups from the sub menu.
2. Any previously defined groups will be displayed when the screen opens.
3. Click the Add button and enter a name for the group and from the list of roles select the relevant role to attach to the group.
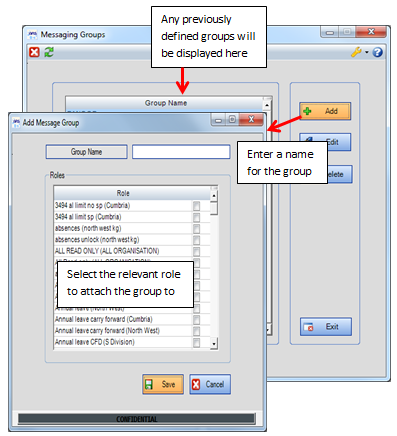
4. Click Save. These groups are linked to the Roles in System Security; this means that all staff allocated to that Role (and subsequently their attached Security Ranges) are set up to start receiving messages.
Edit a Messaging Group
1. Click on the Tools option on the main menu and then select Messaging Groups from the sub menu.
2. Any previously defined groups will be displayed when the screen opens.
3. Highlight the required messaging group and click on the Edit button.
4. Make the required changes and click Save.
Delete a Messaging Group
1. Click on the Tools option on the main menu and then select Messaging Groups from the sub menu.
2. Any previously defined groups will be displayed when the screen opens.
3. Highlight the required messaging group and click on the Delete button. At the message confirming the deletion, click Yes to delete the group.
FAQ
Q: How to send a message?
A: A message can be sent through the Message Centre. See the Message Centre for more details.